ESP32 Remote Monitoring Projects | Beginner to Advanced
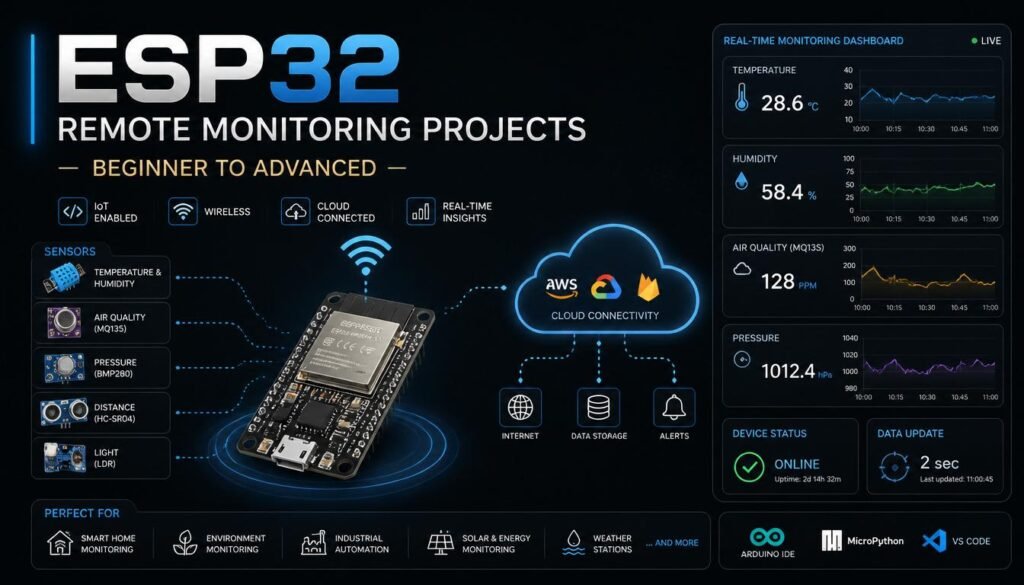
If you want to monitor your home, your garden, or even a remote cabin from anywhere in the world, the ESP32 is your absolute best friend. This tiny microchip costs less than a fancy cup of coffee, but it packs enough processing punch and wireless connectivity to run an entire smart home ecosystem. Whether you are an absolute novice who has never touched a wire or a seasoned builder looking to deploy off-grid nodes, I have designed this guide to take you from a total beginner to an advanced Internet of Things master.
Why the ESP32 Reigns as the Smart Home King:
Before we start wiring components, we need to look at why this specific development board dominates the technology world. In the old days, if you wanted a microcontroller to talk to the internet, you had to buy an expensive add-on Wi-Fi shield that was bulky and unreliable.
The ESP32 changed everything by building both a 2.4 GHz Wi-Fi network antenna and a Bluetooth Low Energy chip directly onto the silicon wafer. It features a dual-core processor running at up to 240 MHz, which means it can easily read local sensor data with one core while simultaneously talking to a global cloud server on the other core.
Today, there are a few main versions of the chip that you will encounter in the wild. The original ESP32 is highly versatile and remains the safe choice for most hobbyist libraries. The newer ESP32-C3 uses a modern RISC-V computer architecture and is perfect for low-cost, low-power battery operations. Finally, the high-performance ESP32-S3 model includes special hardware accelerators made for artificial intelligence tasks, such as machine learning on the edge or face recognition with a camera attachment. For the projects below, a standard ESP32 development board will work perfectly.
Level 1: The Beginner Local Web Server Weather Station:
When you are first starting out, you do not want to worry about complex online databases or cloud security codes. Your first goal should be to read a real physical environment and view that information on your phone while connected to your home network.
For my first successful remote monitoring build, I combined an ESP32 board with a cheap DHT22 temperature and humidity sensor. The DHT22 is a great component because it uses a simple digital signal to send highly accurate environmental readouts directly to your microcontroller’s GPIO pins.
The Project Blueprint:
You connect the power pin of the DHT22 to the 3.3 volt pin on your ESP32, connect the ground pin to ground, and route the data pin to a digital input like GPIO pin 4. You then plug the board into your computer using a standard USB cable and open up the free Arduino IDE software to flash your firmware code.
How It Works Dynamically:
Inside the code, you instruct the ESP32 to log onto your local home Wi-Fi router using your network password. Once connected, the board acts like a tiny, invisible website host inside your house. It reads the air temperature and humidity every two seconds, wraps those numbers into a basic HTML web page design, and broadcasts a local IP address to your computer monitor.
When you type that specific IP address into any smartphone web browser in your house, a clean screen pops up showing your current room metrics. This project is a fantastic first step because it teaches you the fundamentals of wireless communication without the headache of external cloud servers.
Level 2: The Intermediate Multi-Room Cloud Dashboard:
Once you master local hosting, you will quickly realize its major limitation. The moment you leave your driveway and disconnect from your home Wi-Fi network, your local web server becomes completely unreachable. To fix this issue, you need to transition to an intermediate system that pushes data out to a live global cloud server dashboard.
For this tier of remote monitoring, I highly recommend using a dedicated Internet of Things platform like the Blynk app or ThingSpeak. These services provide free developer tiers that allow you to build gorgeous visual mobile apps with drag-and-drop buttons, dials, and real-time history charts.
Leveling Up Your Sensors:
Instead of just measuring basic room air, let us turn this into a comprehensive garage or greenhouse monitoring system. We will add a BMP280 atmospheric pressure sensor to predict changes in the weather, along with a capacitive soil moisture probe buried deep in a plant pot. I prefer capacitive probes because they use an electrical field to measure wetness, which prevents the metal from rusting away over time, as cheap resistive sensors do.
Navigating the Cloud Architecture:
In your firmware code, you will import the official Blynk library and paste a unique authentication token provided by the app. Instead of serving an old-school static web page, your ESP32 now uses the MQTT protocol or standard HTTP requests to stream your sensor data packets into the cloud every thirty seconds.
Now, whether you are sitting at your office desk across town or lounging on a beach halfway around the world, you can open your smartphone app and see live, beautiful line graphs of your home data. You can even set up automated push notifications that cause your phone to buzz if your home garage drops below freezing or if a soil sensor detects that your plants are totally bone dry.
Level 3: The Advanced Off-Grid Solar Node with Home Assistant:
Now it is time to throw away the comfortable USB power cords and build an industrial-grade, fully independent remote monitoring node. Imagine you want to monitor the environmental conditions inside a distant backyard shed, a private water well, or a remote agricultural field where no wall outlets exist.
To survive in the wild, your advanced ESP32 node must master two critical concepts: hardware power management and advanced automation platform integration.
Defeating High Power Consumption:
If you leave a standard ESP32 running normally on a battery pack, its Wi-Fi antenna will completely drain the cells within a single day. To prevent this failure, we must utilize the chip’s built-in Deep Sleep mode.
During Deep Sleep, the main dual-core processor, the Wi-Fi radio, and most internal peripherals are completely shut down. The power consumption drops from over one hundred milliamperes down to a tiny handful of microamperes. The chip essentially acts like it is completely turned off, keeping only an internal low-power timer running.
The Advanced Hardware Setup:
You will pair your ESP32-C3 board with a lithium iron phosphate battery, a small five-volt solar panel, and a dedicated solar charge controller circuit. For the software side, instead of writing raw code from scratch, you can deploy ESPHome firmware, which integrates perfectly with a local Home Assistant server running on a Raspberry Pi inside your main residence.
| Project Tier | Communication Method | Primary Software Tool | Battery Life Expectancy |
| Beginner | Local HTTP Web Server | Arduino IDE & Web Browser | Requires constant wall power |
| Intermediate | Global MQTT Data Streams | Blynk App Cloud Engine | 2 to 4 days on a standard power bank |
| Advanced | ESP-NOW or Home Assistant API | ESPHome Framework & Deep Sleep | Infinite runtime using a small solar panel |
The Advanced Operational Loop:
When the system boots up, the ESP32 wakes up from its deep slumber, initializes your environmental sensors, and takes a rapid reading. Instead of performing a long, power-heavy Wi-Fi handshake with your router, the chip can use a lightning-fast protocol called ESP-NOW to blast the data packet directly to a receiving gateway node in your house within a fraction of a second.
The moment the data package leaves the antenna, the code commands the chip to dive straight back into Deep Sleep for the next fifteen minutes. Because the board is only awake and consuming power for less than half a second out of every fifteen minutes, your small solar panel can easily charge the battery faster than it drains, creating a truly permanent, self-sustaining remote monitoring system.
Conclusion:
The journey from a basic local web server to a completely self-powered, solar-driven data node highlights just how incredibly flexible the ESP32 ecosystem is for modern electronics enthusiasts. You do not need an advanced engineering degree to build highly dependable Internet of Things devices that improve your daily life. By starting simple with local web hosting, upgrading into beautiful cloud dashboards, and eventually mastering deep sleep optimization routines, you can easily protect your property and track your environmental data with total confidence. Grab a development board, warm up your soldering iron, and start building your own connected universe today.
FAQs:
1. Why does my ESP32 web server project drop its connection randomly?
This issue is usually caused by an inadequate power supply, as the Wi-Fi antenna requires sudden spikes of electrical current that standard computer USB ports sometimes fail to provide.
2. Can I program an ESP32 using the Python programming language?
Yes, you can easily flash MicroPython firmware onto the chip, which allows you to write clean Python scripts instead of traditional C++ code.
3. What is the maximum outdoor range for a standard ESP32 Wi-Fi signal?
With a clear line of sight and no physical walls in the way, a standard onboard antenna can usually maintain a stable connection up to one hundred meters away.
4. Do I need to buy an expensive external antenna for the ESP32?
No, the built-in trace antenna printed directly onto the circuit board is more than sufficient for almost all indoor and close-range hobbyist projects.
5. What is the main benefit of using ESPHome over raw Arduino code?
ESPHome allows you to create incredibly stable smart home firmware configurations using simple text files without needing to write complex code lines.
6. Is it safe to expose a bare ESP32 board to outdoor weather conditions?
No, the board will short-circuit instantly if it encounters rain or heavy humidity, so you must always house your electronics inside a weatherproof plastic enclosure.